A lot of business correspondence occurs via email. With Microsoft Outlook being a popular email tool, the ability to integrate it with Maximizer CRM is great, as it allows you to send and save emails directly in Maximizer CRM. This means you can quickly and easily track email threads, create new contacts, tasks and customer service cases all from within Outlook. In other words, this integration allows you to easily store and view important information without having to hop from one application to the other.
July 2023 Update introducing Maximizer Connect for Outlook 365
The Maximizer Cloud M7 update’s (for anyone on Maximizer Cloud or Sales Leader Edition) main highlight was the new Native Maximizer Connect for Outlook 365 application that’s ready to take your communication and productivity game to a whole new level with your favourite email app.
As such a major update, we dedicated a blog to Maximizer Connect for Outlook 365.
If you’re short on time, simply head to the Maximizer App Directory to install the new Maximizer Connect for Outlook 365 today. Here’s a quick video to show you how:
Original Outlook Integration for Non Outlook 365 Users, On-Premise or Privately Hosted Maximizer Solutions
So, first things first. In order to proceed, Outlook Integration for Maximizer CRM must be downloaded and installed first.
Watch this video to see how to set up your Microsoft Outlook Integration with Maximizer CRM or alternatively scroll to see the step by step instructions below.
How to download and install the Outlook Integration
The correct installation file for your version of Maximizer CRM can be found within the Maximizer software.
1. From the Administration menu, select Desktop and Mobile Setup.
2. Then, from the Microsoft Outlook Integration section, select Download Outlook Integration.
3. When the file has downloaded, ensure Outlook is closed, then open the downloaded file to launch the installation wizard
Note: You may not have the necessary permissions/security rights to install the integration yourself, in which case contact your IT department/provider.
Note: The Maximizer Outlook integration requires the installation of the Microsoft .NET Framework 3.5 SP1 to be installed. If you are prompted at the start of the integration installation that this is required, you should install this before you proceed to configure your Outlook integration. Once this update has been downloaded and installed, you can continue with the Outlook integration installation as normal.
4. When the InstallShield Wizard opens, simply click Next and then Install.
5. When the installation has successfully completed, click Finish.
Before using the Outlook Integration, you need to configure Outlook to communicate with Maximizer CRM. You must specify the Maximizer URL, the Address Book, and your Maximizer user ID and password. You can also set default preferences for creating new Address Book entries, and configure Outlook Synchronisation.
How to set up Microsoft Outlook Integration
The Outlook Integration for Maximizer wizard opens automatically when you start Outlook, letting you choose the settings for the integration. After setting up Outlook integration, you can change these settings at any time by selecting the Maximizer Outlook Integration Options icon in Outlook.
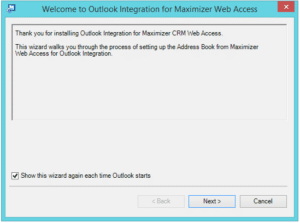
1. After installing Outlook integration for Maximizer, open Outlook. The Outlook Integration for Maximizer wizard opens. Click Next.
Tip: To prevent the wizard from opening every time you open Outlook, clear the Show this
wizard each time Outlook starts checkbox.
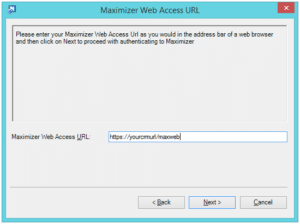
2. Enter the Maximizer URL. By default, the Maximizer URL is in the following form:
http://<servername>/MaximizerWebAccess/ and click Next.
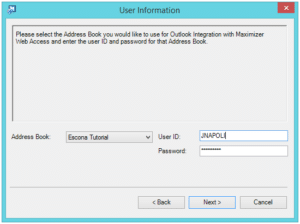
3. In the Address Book drop-down list, select the Maximizer Address Book that you want Outlook to connect to (there is usually only one but some organisations have multiple databases). Enter your Maximizer User ID and Password, and click Next.
Tip: If you have forgotten your login details, contact your Maximizer Administrator.
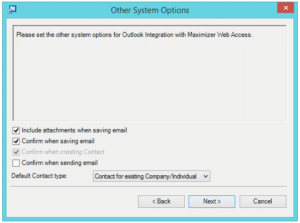
4. Select the options for creating Address Book entries and saving email messages as required then click Next.
- Select Include attachments when saving email to save email attachments by default when saving email messages to Maximizer entries.
- Select the Confirm when saving email and the Confirm when creating Contact options to specify details before saving email or contact information to Maximizer.
- Select the Confirm when sending email option to be prompted each time you send an email from Outlook to save the email to Maximizer.
- In the Default Contact type drop-down list, select the type of Address Book entry that is created when you add contacts from Outlook.
Tip: If the “Confirm when creating Contact” option is selected, you can select a different type of Address Book entry while creating the entry.
5. Specify the frequency for synchronisation between Maximizer and Outlook, and click Next.
6. Specify the options for synchronising appointments between Maximizer and Outlook, and click Next.
7. Specify the options for synchronising tasks between Maximizer and Outlook, and click Next.
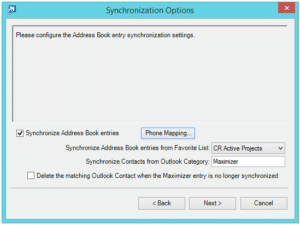
8. Specify the options for synchronising contacts between Maximizer and Outlook, and click Next.
- Select Synchronize Address Book entries if you want to synchronize contacts between Maximizer and Outlook.
- In the Synchronize Address Book entries from Favorite List drop-down, select the Maximizer Favorite List that you want to synchronize entries from.
- In the Synchronize Contacts from Outlook Category field, enter the Outlook contact category that you want to synchronize entries from.
- Click Phone Mapping to set up a mapping between Outlook contact phone number fields and the corresponding phone number fields in Maximizer Address Book entries.
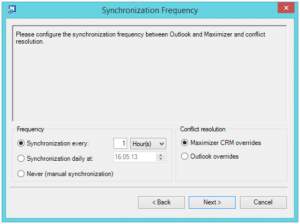
9. Specify the options for synchronising appointments between Maximizer and Outlook, and click Next.
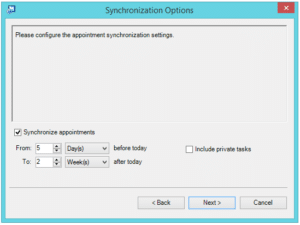
10. Specify the options for synchronising tasks between Maximizer and Outlook, and click Next.
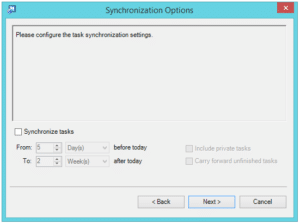
11. Specify the options for synchronising Address Book entries between Maximizer and Outlook, and click Next.
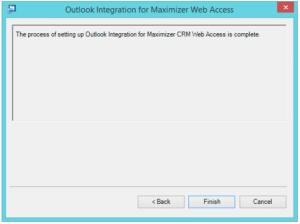
12. The Outlook Integration has been successfully set up. Click Finish.
13. Your Outlook ribbon will now have a new tab called Maximizer.
We hope you find these tutorials useful, but do contact us if you need any help with using Maximizer CRM:
- Tel: +44 (0)1992 661244
- Email: enquiries@avrion.co.uk
- Follow us on LinkedIn
- Subscribe to our YouTube channel
- Contact us here

